Cleaning your dog’s ears is absolutely vital to maintaining your pooch’s overall health and wellbeing. Keeping your dog’s ears clean can prevent them from getting ear infections and troublesome ear parasites, such as mites.
But, this task can easily become complicated and difficult. After all, you must ensure that you do get all the gunk out of your pet’s ears while also ensuring that you do not injure them. It can be quite complicated indeed. Luckily, there is a way to clean your canine’s ears that produces more significant results with minimum risk.
Follow these 5 easy steps to effectively and safely clean your dog’s ears:
- Inspect Your Dog’s Ears
- Gather Supplies to Clean Your Dog’s Ear
- Clean the Outside of Your Dog’s Ear
- Clean the Inside of Your Dog’s Ear
- Check Your Dog’s Ear for Problems
Step 1: Inspect Your Dog’s Ear
The very first step to cleaning your dog’s ear is to, well, make sure you actually need to clean your dog’s ears! Some domestic dogs need their ears cleaned more often than others, especially if they are a species with longer hair. Just like humans, every dog is an individual, and some dogs will just need their ears cleaned more than others.
In order to inspect your pup’s ears, you should kneel or sit near your dog when they are calm. Trying to look at a dog’s ears while they’re jumping around and excited can be nearly impossible! Look for any sign of physical damage, such as scratches, scabs, or wounds. These can indicate problems, which we will discuss in a later step. In a perfect world, your pooch’s ear would be as clean as a whistle. But, most of the time, this is not the case. If you notice a buildup of dirt or earwax, it is time to get scrubbing!
Step 2: Gather Supplies to Clean Your Dog’s Ear
When you discover that you do need to clean your dog’s ears, your second step should be to gather all the necessary supplies. The most important supply you need is a commercial dog ear cleaner. While you can make a cleaner at home, commercial ear cleaners are nearly always more effective and safer. All the measuring has already been done for you, and you won’t have to worry about accidentally mixing something incorrectly and damaging your pup’s sensitive ear! Our recommendation is to pick an ear cleaner that is top rated and proven to be effective, such as Virbac Epi-Otic Advanced Ear Cleaner. You can also check out our list of “The Best Dog Ear Cleaners.”
You’ll also need cotton balls. Cotton balls are recommended over cotton swabs because they cannot be shoved so far into the ear canal that they cause damage. Cotton swabs can be used if you have not cotton balls on hand. But, going this route means that you will have to be extra cautious not to damage your pet’s ear.
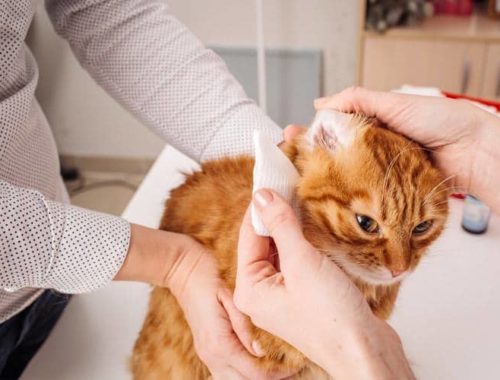
Step 3: Clean the Outside of Your Dog’s Ear
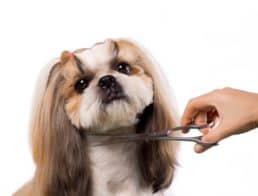
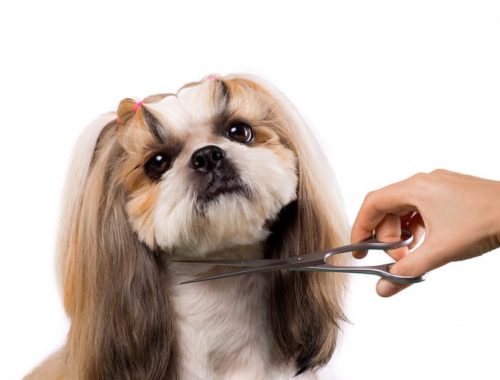
First, you’ll need to ensure that there are no mats or tangles of hair inside your dog’s ear. This is very common in dogs with longer hair. If you do find mats, you will need to trim them in order to ensure that dirt and earwax don’t get lodged behind them. When the hair around the ear has been trimmed, wipe down the outside portion of your dog’s ear.
In most dogs, this can be done easily with a wet cotton ball. Simply dip the cotton ball in warm water, squeeze out the excess water, and then gently clean the outside of your canine’s ear. If your dog has extremely long, floppy ears, it is best to wipe on the outside of their ear with a wet washcloth first. No matter your dog’s ear type, pay close attention to the small nooks and crannies of your dog’s ear. It is in these areas that dirt tends to build up.
Step 4: Clean the Inside of Your Dog’s Ear
Cleaning the inside of your dog’s ear takes precision and patience. Much like the previous step, simply wipe what you can with a wet cotton ball. The key is to not force the cotton ball deeply into the ear canal. Only wipe the places that are within easy reach and do not require pressure to get to. Once you feel resistance from your dog, stop. If your dog’s ears are extremely dirty, you might need to rinse them out thoroughly.
Step 5: Check Your Dog’s Ears for Problems
The best time to check your dog’s ears for problems is while cleaning them. Keep an especially close eye out for mites, yeast infections, and bacterial infections. When sick, dogs usually have multiple symptoms and behavioral changes, so it’s in your pet’s best interest to keep an eye out for these symptoms as well.